Bundling is the name for a technique where one dyes a fabric by wrapping it tight together with dyeplants and heats it or leaves it a few days in a warm place.
I have done the same but with my handspun yarn. You wrap the pre mordanted, moist/wet yarn together with dyeplants in a bundle, heat it (I did it in the microwave but originally you steam it), leave it to cool (I left it 4-5 days in a big glass jar so that it remains humid), unwrap and wash/dry it. This was new to me and I tried it with walnut, onion, reed, some madder and sandelwood.
I used a lot of plant material, on and betreen the strands of yarn, and also, when the bundle was all rolled up, I put an outer layer of reed plumes (is it called reed plumes?) to wrap around.
As I was afraid that small stuff would attach to the yarn and would be difficult to remove, I put the madder and sandlewood in paper teabags, just a little bit in each bag, and laid it out on the skein. But actually everything fell out quite easily afterwards, no onion flakes or walnut peel crumbs were left so there was no need to worry.
The microwave was my idea as I do not have steaming equipment and when dyeing with acid dyes one can use the microwave: 3 minutes on (max effect), 7 minutes rest, and this sequence repeated 3 times, so 30 minutes in total.
I found that the dried plant materials soaked up quite a lot of moisture that was in the yarn, and thought that, next time, either the yarn must contain more water when starting, or steaming would be better. With a little more moisture, I believe that the colour spreads a little bit wider away from the plant material. So now I found a metal sieve at a thrift store and plan to steam for the next experiment. Steaming would be done for an hour or so.
An advantage of steaming above the microwave is also that you can add some rusty parts, to do after-treatment with iron to influence colour. Yellow from onions turns green with iron. I would not dare to put skrews and bolts in the microwave, but one can include some in the bundle when steaming.
I also believe that the result is so striking because of the dark brown from the walnuts. They are really super for this method! My walnuts are gone but for next year I am already thinking to put some in the freezer. So if you still have access to walnut shells, and want to do this bundling somewhat later in the year, e.g. with spring or summer plants, put some aside!
Here you see how I put all the dye stuff in the skein and wrap it. You can also see that the whole package is wrapped in reed plumes at the outside.
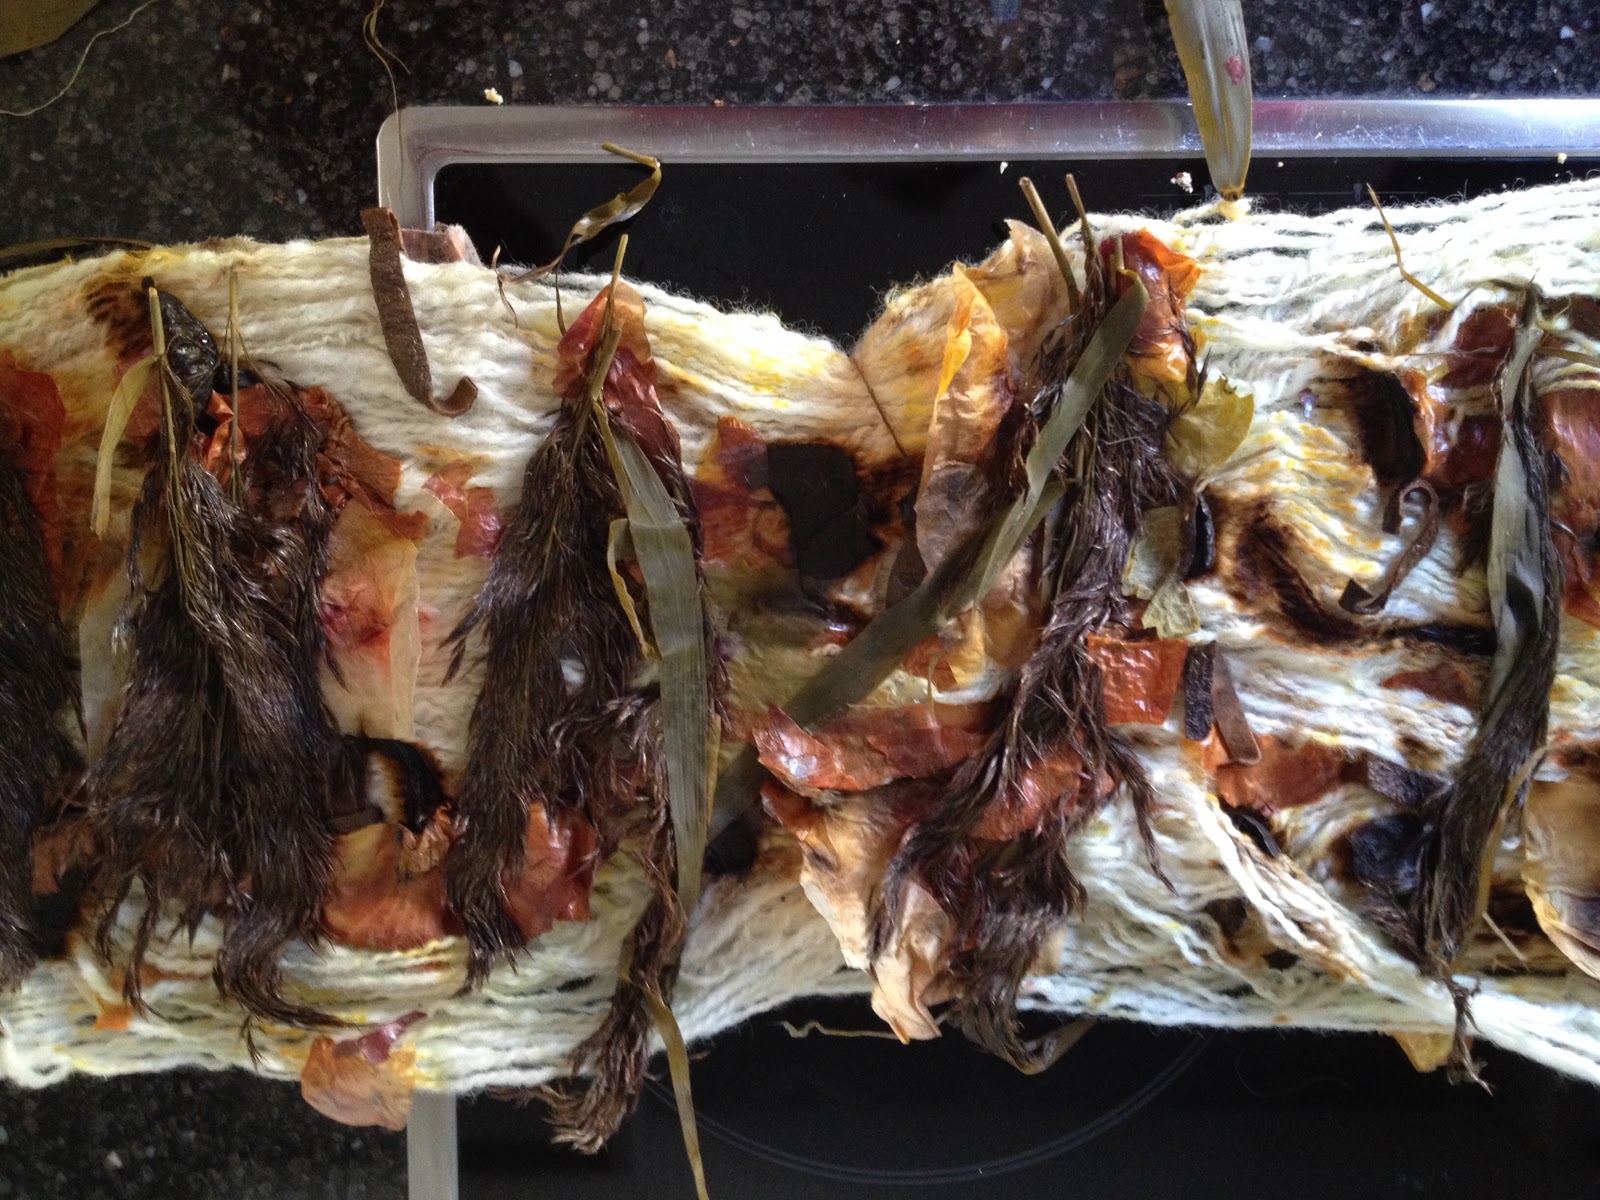
This is how it looked when I unwrapped it.
And with all the plant material removed, before and after washing. You still see the spots in the skein where the various dyestuff was wrapped, especially the walnut!
And lastly, when re-skeined into a fresh skein.